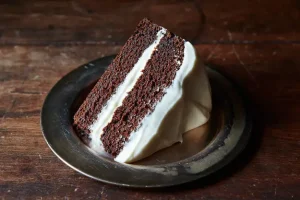
Chocolate Maple Cake
Ingredients:
For the Cake:
- 1 ¾ cups all-purpose flour
- 1 ½ teaspoons baking powder
- ½ teaspoon baking soda
- ¼ teaspoon salt
- ¾ cup unsweetened cocoa powder
- ½ cup unsalted butter, softened
- 1 cup granulated sugar
- ½ cup pure maple syrup
- 2 large eggs
- 1 teaspoon vanilla extract
- ¾ cup buttermilk
For the Maple Frosting:
- ½ cup unsalted butter, softened
- 3 cups powdered sugar
- ¼ cup pure maple syrup
- 1 teaspoon vanilla extract
- 2-3 tablespoons milk (as needed for consistency)
For the Garnish (Optional):
- Crushed walnuts or pecans
- Additional maple syrup for drizzling
Instructions:
1. Prepare the Cake:
- Preheat your oven to 350°F (175°C). Grease and flour two 9-inch round cake pans or line them with parchment paper.
- In a medium bowl, whisk together the flour, baking powder, baking soda, salt, and cocoa powder.
- In a large bowl, beat the softened butter and granulated sugar until light and fluffy.
- Beat in the eggs one at a time, then add the vanilla extract and maple syrup, mixing until well combined.
- Gradually add the dry ingredients to the butter mixture, alternating with the buttermilk. Begin and end with the dry ingredients, mixing until just combined.
- Divide the batter evenly between the prepared cake pans and smooth the tops.
- Bake for 25-30 minutes, or until a toothpick inserted into the center comes out clean.
- Allow the cakes to cool in the pans for 10 minutes before transferring to a wire rack to cool completely.
2. Prepare the Maple Frosting:
- In a medium bowl, beat the softened butter until creamy.
- Gradually add the powdered sugar, beating on low speed until combined.
- Add the maple syrup and vanilla extract, and continue to beat until the frosting is smooth and creamy. If the frosting is too thick, add milk, one tablespoon at a time, until you reach the desired consistency.
3. Assemble the Cake:
- If necessary, level the tops of the cakes with a knife or cake leveler.
- Place one cake layer on a serving plate or cake stand. Spread a layer of frosting on top.
- Place the second cake layer on top and frost the top and sides of the cake.
- Garnish with crushed walnuts or pecans if desired, and drizzle with additional maple syrup.
4. Serve and Enjoy:
- Slice and serve your Chocolate Maple Cake. It pairs wonderfully with a cup of coffee or a glass of milk.
This cake combines the rich flavors of chocolate with the warm, caramel-like sweetness of maple syrup. Enjoy baking and indulging in this treat!
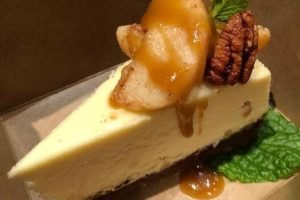
Carrot Pecan Pie Recipe
Ingredients:
For the Crust:
- 1 ¼ cups all-purpose flour
- ¼ cup granulated sugar
- ¼ teaspoon salt
- ½ cup cold unsalted butter, cut into small pieces
- 1 large egg yolk
- 2-3 tablespoons ice water
For the Filling:
- 1 cup finely grated carrots (about 2 medium carrots)
- 1 cup light brown sugar, packed
- ¾ cup corn syrup
- ¼ cup unsalted butter, melted
- 3 large eggs
- 1 teaspoon vanilla extract
- 1 teaspoon ground cinnamon
- ¼ teaspoon ground nutmeg
- ¼ teaspoon ground ginger
- ¼ teaspoon salt
- 1 cup chopped pecans
Instructions:
1. Prepare the Crust:
- In a food processor, combine the flour, sugar, and salt. Add the cold butter and pulse until the mixture resembles coarse crumbs.
- In a small bowl, whisk together the egg yolk and 2 tablespoons of ice water. Add this mixture to the food processor and pulse until the dough starts to come together. If needed, add the remaining ice water, one tablespoon at a time, until the dough holds together when pressed.
- Turn the dough out onto a lightly floured surface and form it into a disk. Wrap in plastic wrap and refrigerate for at least 30 minutes.
2. Preheat the Oven:
- Preheat your oven to 375°F (190°C).
3. Roll Out the Dough:
- On a floured surface, roll out the chilled dough to fit a 9-inch pie dish. Carefully transfer the dough to the pie dish and trim any excess. Crimp the edges as desired.
4. Prepare the Filling:
- In a large bowl, combine the grated carrots, brown sugar, corn syrup, melted butter, eggs, vanilla extract, cinnamon, nutmeg, ginger, and salt. Mix well until fully combined.
- Stir in the chopped pecans.
5. Assemble and Bake:
- Pour the filling into the prepared pie crust and spread it evenly.
- Bake for 45-50 minutes, or until the filling is set and the top is golden brown. If the crust begins to over-brown, cover the edges with foil to prevent burning.
6. Cool and Serve:
- Allow the pie to cool completely on a wire rack before serving. This allows the filling to set properly.
Optional:
- Serve with a dollop of whipped cream or a scoop of vanilla ice cream for an extra treat.
Enjoy your Carrot Pecan Pie, which combines the classic pecan pie filling with a delightful twist of carrots and warm spices!
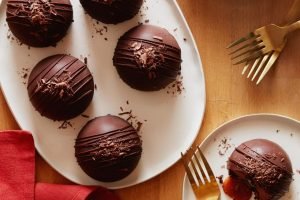
Chocolate Bombs
Ingredients:
For the Chocolate Shells:
- 1 ½ cups good-quality chocolate chips (dark, milk, or semi-sweet)
- ¼ cup of chocolate chips (for filling, optional)
For the Filling:
- 1 cup hot cocoa mix (store-bought or homemade)
- ½ cup mini marshmallows
- ¼ cup crushed candy canes or chocolate chips (optional, for added flavor)
Equipment:
- 6-cavity silicone sphere mold (or a similar mold)
- Small piping bag or spoon (for filling)
Instructions:
1. Melt the Chocolate:
- Place the 1 ½ cups of chocolate chips in a heatproof bowl. Melt the chocolate using a double boiler or in the microwave in 30-second intervals, stirring after each interval until smooth.
2. Coat the Molds:
- Once the chocolate is melted, use a spoon or a small piping bag to coat the inside of each cavity of the silicone mold. Make sure the coating is even and covers the sides and bottom. You can use a brush or the back of the spoon to help with this.
- Place the mold in the refrigerator for about 10 minutes to set. Repeat the process to create a thicker shell, if desired, by adding a second layer of chocolate and chilling again.
3. Prepare the Filling:
- In a small bowl, mix the hot cocoa mix with mini marshmallows. If you want, you can also add crushed candy canes or extra chocolate chips for added flavor and texture.
4. Assemble the Chocolate Bombs:
- Carefully remove the chocolate spheres from the mold once they have completely set.
- Place one half of the chocolate sphere on a plate or cutting board. Spoon the hot cocoa mix and marshmallows into the center of the half sphere.
- To seal the bomb, gently melt the edge of the other half of the chocolate sphere by placing it in a warm skillet for a few seconds, or use a heatproof plate or mug. Quickly press this melted edge onto the filled half to seal the bomb. You can use a small amount of melted chocolate to help seal the edges if needed.
5. Decorate (Optional):
- Melt a small amount of additional chocolate (about ¼ cup) and drizzle it over the finished bombs. You can also sprinkle extra mini marshmallows, crushed candy canes, or edible glitter for a festive touch.
6. Store and Serve:
- Store the finished chocolate bombs in an airtight container at room temperature or in the refrigerator if you prefer.
- To enjoy, simply place a chocolate bomb into a mug of hot milk or hot water and watch it melt and release its cocoa mix and marshmallows. Stir to combine and enjoy your creamy, delicious hot cocoa!
These chocolate bombs are perfect for gifting or enjoying yourself. Have fun making them!
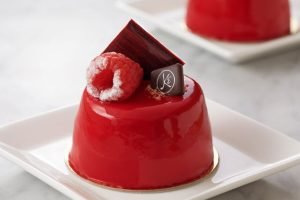
Raspberry Glaze
Ingredients:
- 1 cup fresh or frozen raspberries
- ½ cup granulated sugar
- 1 tablespoon lemon juice (freshly squeezed is best)
- 1 tablespoon cornstarch
- 2 tablespoons water
- 1 teaspoon vanilla extract (optional)
Instructions:
1. Prepare the Raspberry Mixture:
- In a medium saucepan, combine the raspberries and granulated sugar. Cook over medium heat, stirring occasionally, until the raspberries break down and the mixture begins to bubble, about 5-7 minutes.
2. Create a Cornstarch Slurry:
- In a small bowl, mix the cornstarch with 2 tablespoons of water to create a slurry.
3. Thicken the Glaze:
- Once the raspberry mixture is bubbling, stir in the cornstarch slurry. Continue to cook and stir until the mixture thickens and becomes glossy, about 2-3 minutes.
4. Add Lemon Juice and Vanilla (Optional):
- Remove the saucepan from the heat. Stir in the lemon juice and vanilla extract (if using). The lemon juice adds a nice balance of acidity to the sweet glaze.
5. Strain (Optional):
- For a smooth glaze, you can strain the mixture through a fine-mesh sieve to remove the seeds. Use the back of a spoon to push the mixture through the sieve.
6. Cool and Use:
- Allow the raspberry glaze to cool slightly before using. It will thicken a bit more as it cools. Drizzle it over cakes, pastries, or your favorite dessert.
7. Store Leftovers:
- If you have any leftover glaze, store it in an airtight container in the refrigerator for up to a week. Reheat gently before using, as it may thicken in the fridge.
This raspberry glaze is perfect for adding a burst of fruit flavor and a vibrant color to your desserts. Enjoy!
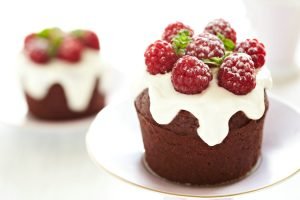
Fresh Fruit Cupcakes
Ingredients:
For the Cupcakes:
- 1 ¾ cups all-purpose flour
- 1 ½ teaspoons baking powder
- ¼ teaspoon salt
- ½ cup unsalted butter, softened
- 1 cup granulated sugar
- 2 large eggs
- 1 teaspoon vanilla extract
- ½ cup milk (whole or 2%)
- 1 cup finely chopped fresh fruit (such as strawberries, blueberries, or raspberries; see notes for preparation)
For the Fruit Filling (Optional):
- ½ cup of finely chopped fresh fruit (same type as used in cupcakes)
- 2 tablespoons granulated sugar
- 1 teaspoon lemon juice
For the Frosting (Optional):
- ½ cup unsalted butter, softened
- 2 cups powdered sugar
- 2 tablespoons milk
- 1 teaspoon vanilla extract
- ¼ cup pureed fresh fruit (same type as used in cupcakes) or fruit jam
Instructions:
1. Prepare the Fruit Filling (Optional):
- In a small bowl, combine the finely chopped fresh fruit, granulated sugar, and lemon juice. Let it sit for about 10-15 minutes to macerate. This will make the fruit juicy and sweet, perfect for a filling.
2. Preheat the Oven:
- Preheat your oven to 350°F (175°C) and line a 12-cup muffin pan with paper liners.
3. Prepare the Cupcake Batter:
- In a medium bowl, whisk together the flour, baking powder, and salt.
- In a large bowl, beat the softened butter and granulated sugar until light and fluffy.
- Beat in the eggs one at a time, then add the vanilla extract.
- Gradually add the dry ingredients to the butter mixture, alternating with the milk. Begin and end with the dry ingredients, mixing until just combined.
- Gently fold in the finely chopped fresh fruit.
4. Fill and Bake:
- If using, spoon a small amount of the fruit filling into the center of each cupcake liner before adding the batter.
- Divide the cupcake batter evenly among the cupcake liners.
- Bake for 18-22 minutes, or until a toothpick inserted into the center comes out clean.
- Let the cupcakes cool in the pan for 5 minutes before transferring them to a wire rack to cool completely.
5. Prepare the Frosting (Optional):
- In a medium bowl, beat the softened butter until creamy.
- Gradually add the powdered sugar, beating on low speed until combined.
- Add the milk, vanilla extract, and pureed fruit (or fruit jam), and continue to beat until the frosting is smooth and spreadable. If needed, adjust the consistency with additional milk or powdered sugar.
6. Frost and Decorate:
- Once the cupcakes are completely cooled, frost them with the fruit-flavored frosting using a spatula or piping bag.
- Garnish with additional fresh fruit or a dusting of powdered sugar if desired.
7. Serve and Enjoy:
- Serve your fresh fruit cupcakes at room temperature and enjoy the burst of natural fruit flavor!
Notes:
- Fresh Fruit Preparation: If using berries, wash and pat dry before chopping. For larger fruits like peaches or apples, peel and dice them into small pieces.
- Fruit Filling: Adding a fruit filling is optional but can enhance the flavor and add extra moisture. Adjust the amount of sugar based on the sweetness of the fruit used.
These cupcakes are perfect for showcasing seasonal fruit and making any occasion a bit more special!
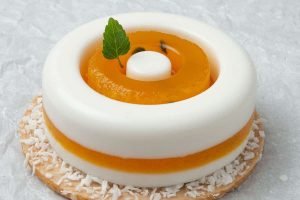
Coconut Panna Cotta with Passion Fruit
Ingredients:
For the Coconut Panna Cotta:
- 1 ½ cups coconut milk (canned, full-fat)
- 1 cup heavy cream
- ½ cup granulated sugar
- 1 teaspoon vanilla extract
- 2 teaspoons gelatin powder (or 1 packet, about 7g)
- 3 tablespoons cold water
For the Passion Fruit Topping:
- 1 cup passion fruit juice (fresh or store-bought)
- 2 tablespoons granulated sugar
- 1 teaspoon lemon juice (optional, for extra tanginess)
- 1 teaspoon gelatin powder (or ½ packet, about 3.5g)
- 2 tablespoons cold water
Instructions:
1. Prepare the Gelatin:
- For the panna cotta: Sprinkle 2 teaspoons of gelatin powder over 3 tablespoons of cold water in a small bowl. Let it sit for about 5 minutes to bloom.
- For the passion fruit topping: In another small bowl, sprinkle 1 teaspoon of gelatin powder over 2 tablespoons of cold water and let it sit for about 5 minutes to bloom.
2. Make the Coconut Panna Cotta:
- In a medium saucepan, combine the coconut milk, heavy cream, and granulated sugar. Heat over medium heat, stirring occasionally, until the sugar has dissolved and the mixture is hot but not boiling.
- Remove from heat and stir in the vanilla extract.
- Add the bloomed gelatin to the hot coconut mixture and stir until completely dissolved.
- Pour the mixture into serving glasses or molds and refrigerate for at least 4 hours, or until set.
3. Make the Passion Fruit Topping:
- In a small saucepan, combine the passion fruit juice, granulated sugar, and lemon juice (if using). Heat over medium heat, stirring until the sugar is dissolved and the mixture is hot.
- Remove from heat and stir in the bloomed gelatin until completely dissolved.
- Allow the passion fruit mixture to cool slightly, then carefully pour or spoon it over the set coconut panna cotta.
4. Chill and Serve:
- Refrigerate the panna cotta with the passion fruit topping for an additional 1-2 hours to allow the topping to set completely.
- Serve chilled, garnished with fresh mint leaves, additional passion fruit pulp, or a sprinkle of toasted coconut if desired.
Tips:
- Gelatin Blooming: Make sure to let the gelatin bloom fully before dissolving to ensure a smooth texture.
- Passion Fruit: If using fresh passion fruit, cut it in half and scoop out the pulp. You can strain the pulp to get just the juice, or leave it with seeds for added texture.
- Serving: For an elegant presentation, serve in small glasses or ramekins. If you used molds, carefully unmold the panna cotta by dipping the bottom of the mold briefly in warm water.
Enjoy this creamy, tropical dessert that’s perfect for any occasion!
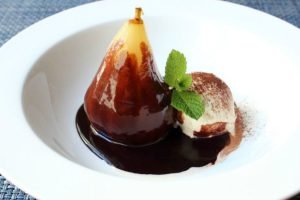
Poached Pears Belle Hélène
Ingredients:
For the Poached Pears:
- 4 ripe but firm pears (such as Bosc or Anjou)
- 2 cups water
- 1 cup granulated sugar
- 1 cup dry white wine (or use more water for a non-alcoholic version)
- 1 cinnamon stick
- 2-3 cloves
- 1 vanilla bean (or 1 teaspoon vanilla extract)
- 1 lemon (for zest and juice)
For the Chocolate Sauce:
- 1 cup heavy cream
- 4 ounces good-quality dark chocolate, chopped
- 2 tablespoons granulated sugar (optional, to taste)
- 1 teaspoon vanilla extract
For Serving:
- Vanilla ice cream or crème fraîche
- Fresh mint leaves (optional, for garnish)
Instructions:
1. Prepare the Pears:
- Peel the pears, leaving the stems intact. You can use a melon baller or paring knife to core the pears from the bottom if desired, but this is optional.
- In a large saucepan, combine the water, sugar, white wine, cinnamon stick, cloves, and the vanilla bean (split and scraped, or vanilla extract). If using lemon zest, add it to the pot.
- Bring to a simmer over medium heat, stirring occasionally until the sugar has dissolved.
2. Poach the Pears:
- Add the pears to the simmering liquid. Reduce the heat to low and cover the pot. Simmer gently for 20-30 minutes, or until the pears are tender when pierced with a fork.
- Carefully remove the pears from the poaching liquid and set them aside on a plate to cool slightly. If desired, you can reduce the poaching liquid to a syrup by simmering it uncovered until it thickens slightly, then strain out the spices and vanilla bean.
3. Make the Chocolate Sauce:
- In a small saucepan, heat the heavy cream over medium heat until it begins to steam but not boil.
- Remove from heat and add the chopped dark chocolate. Let it sit for a minute, then stir until the chocolate is completely melted and the sauce is smooth.
- Stir in the vanilla extract and sugar if desired, adjusting to taste.
4. Serve:
- Arrange the poached pears on serving plates.
- Spoon the chocolate sauce over the pears, allowing it to drizzle down.
- Add a scoop of vanilla ice cream or a dollop of crème fraîche alongside the pears.
- Garnish with fresh mint leaves if desired.
5. Enjoy:
- Serve immediately for the best combination of warm pears and cool ice cream, or chill the pears and serve with the warm chocolate sauce.
This elegant dessert combines the flavors of tender poached pears with a rich chocolate sauce, creating a classic and satisfying finish to any meal. Enjoy!
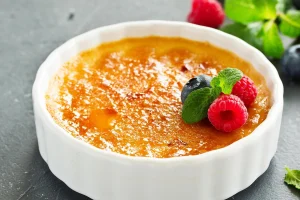
Crème Brûlée
Ingredients:
For the Custard:
- 2 cups heavy cream
- 1 vanilla bean (or 1 tablespoon vanilla extract)
- 5 large egg yolks
- ½ cup granulated sugar
- ¼ cup light brown sugar (optional, for extra flavor)
For the Caramelized Sugar Topping:
- ¼ cup granulated sugar (for each serving)
Instructions:
1. Preheat the Oven:
- Preheat your oven to 325°F (163°C).
2. Prepare the Vanilla Bean (if using):
- Split the vanilla bean lengthwise and scrape out the seeds using the back of a knife.
3. Heat the Cream:
- In a medium saucepan, combine the heavy cream and vanilla bean seeds (and pod, if using). Heat over medium heat until it just begins to simmer. Do not let it boil. If using vanilla extract, add it later.
4. Prepare the Egg Mixture:
- While the cream is heating, whisk the egg yolks and granulated sugar (and light brown sugar, if using) in a large bowl until pale and slightly thickened.
5. Temper the Eggs:
- Once the cream is hot, slowly pour a small amount of the hot cream into the egg yolk mixture, whisking constantly to temper the eggs. Gradually add the remaining hot cream, continuing to whisk.
6. Strain the Custard:
- Strain the custard mixture through a fine-mesh sieve into a clean bowl or pitcher to remove any curdled bits and the vanilla bean pod.
7. Prepare the Ramekins:
- Place 6 to 8 ramekins (depending on size) in a large baking dish. Pour the custard mixture evenly into the ramekins.
8. Bake the Custards:
- Carefully fill the baking dish with hot water until it reaches halfway up the sides of the ramekins (this is called a water bath or bain-marie). Bake in the preheated oven for 35-45 minutes, or until the custards are set but still slightly jiggly in the center. A knife inserted into the edge of the custard should come out clean.
9. Cool and Chill:
- Remove the ramekins from the water bath and let them cool to room temperature. Refrigerate for at least 2 hours or overnight to allow the custard to set.
10. Caramelize the Sugar:
- Before serving, sprinkle a thin, even layer of granulated sugar over each custard.
- Use a kitchen torch to caramelize the sugar until it is golden brown and crispy. Alternatively, you can place the ramekins under a broiler for a few minutes, but watch carefully to avoid burning.
11. Serve:
- Let the caramelized sugar cool and harden for a few minutes before serving.
Tips:
- Vanilla Bean vs. Extract: Using a vanilla bean gives a more intense flavor, but vanilla extract works well and is more convenient.
- Water Bath: The water bath helps to cook the custards evenly and prevents them from curdling. Make sure the water level is right.
- Torch Safety: When using a kitchen torch, be cautious and follow the manufacturer’s instructions. If you don’t have a torch, broiling can work, but keep a close eye on the sugar.
Crème brûlée is a sophisticated and indulgent dessert that’s always a hit. Enjoy making and savoring this classic treat!
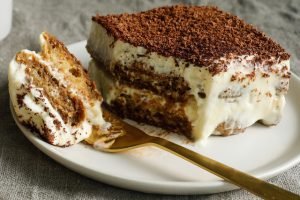
Classic Tiramisu
Ingredients:
For the Tiramisu:
- 6 large egg yolks
- ¾ cup granulated sugar
- 1 cup heavy cream
- 1 cup mascarpone cheese (room temperature)
- 1 cup strong brewed coffee (cooled)
- ¼ cup coffee liqueur (such as Kahlúa, optional)
- 24-30 ladyfingers (savoiardi)
- Unsweetened cocoa powder (for dusting)
For Garnish (Optional):
- Shaved chocolate
- Fresh berries
Instructions:
1. Prepare the Coffee Mixture:
- In a shallow dish, combine the brewed coffee with the coffee liqueur, if using. Set aside to cool.
2. Make the Mascarpone Mixture:
- In a large bowl, whisk the egg yolks and granulated sugar together until pale and slightly thickened.
- Place the bowl over a pot of simmering water (double boiler method) and whisk continuously for about 5 minutes, or until the mixture is slightly warm to the touch. Remove from heat and let it cool slightly.
- In another bowl, beat the heavy cream until stiff peaks form.
- Gently fold the mascarpone cheese into the egg yolk mixture until smooth.
- Fold in the whipped cream in three additions, making sure not to deflate the mixture too much. The mixture should be light and fluffy.
3. Assemble the Tiramisu:
- Briefly dip each ladyfinger into the coffee mixture, making sure not to soak them (they should be moist but not soggy).
- Arrange a layer of dipped ladyfingers in the bottom of a 9×9-inch (or similar) serving dish or trifle bowl.
- Spread half of the mascarpone mixture over the layer of ladyfingers.
- Add another layer of dipped ladyfingers on top of the mascarpone mixture.
- Spread the remaining mascarpone mixture over the second layer of ladyfingers.
4. Chill and Set:
- Cover the dish with plastic wrap and refrigerate for at least 4 hours, or preferably overnight. This allows the flavors to meld and the texture to set properly.
5. Serve:
- Just before serving, dust the top with unsweetened cocoa powder. Garnish with shaved chocolate or fresh berries if desired.
6. Enjoy:
- Scoop and serve your classic tiramisu. It’s a perfect combination of creamy, coffee-flavored layers that’s sure to impress.
Tips:
- Egg Safety: If you’re concerned about using raw eggs, you can use pasteurized eggs or an egg substitute. Alternatively, you can cook the egg yolks gently over a double boiler to ensure safety.
- Coffee Strength: Adjust the strength of the coffee to your taste. Strong coffee works best for a robust flavor, but you can lighten it if preferred.
- Ladyfingers: Ensure that you dip the ladyfingers quickly to avoid them becoming too soggy.
Enjoy making and savoring this classic Italian dessert!
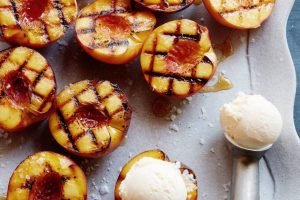
Grilled Peaches with Cream
Ingredients:
For the Grilled Peaches:
- 4 ripe but firm peaches
- 2 tablespoons olive oil (or melted butter)
- ¼ cup granulated sugar (optional, for extra caramelization)
- 1 teaspoon ground cinnamon (optional)
For the Cream:
- 1 cup heavy cream
- 2 tablespoons powdered sugar
- 1 teaspoon vanilla extract
For Garnish (Optional):
- Fresh mint leaves
- Honey or maple syrup
- Crushed nuts (e.g., almonds or pistachios)
Instructions:
1. Prepare the Peaches:
- Cut the peaches in half and remove the pits. If you prefer, you can leave the skins on, but they can be peeled if desired.
- Brush the cut sides of the peaches with olive oil or melted butter to prevent sticking and add flavor.
- For extra caramelization, you can sprinkle the peaches with granulated sugar and ground cinnamon before grilling.
2. Grill the Peaches:
- Preheat your grill to medium-high heat.
- Place the peaches cut side down on the grill. Grill for 4-6 minutes, or until grill marks appear and the peaches start to soften.
- Flip the peaches and grill for an additional 2-3 minutes, or until they are tender but still holding their shape. Remove from the grill and set aside.
3. Prepare the Cream:
- In a mixing bowl, combine the heavy cream, powdered sugar, and vanilla extract.
- Using a hand mixer or stand mixer, beat the mixture on high speed until soft peaks form. Be careful not to overwhip.
4. Serve:
- Arrange the grilled peaches on serving plates or a platter.
- Dollop or drizzle the whipped cream over the peaches.
- Optionally, garnish with fresh mint leaves, a drizzle of honey or maple syrup, and a sprinkle of crushed nuts for added texture and flavor.
5. Enjoy:
- Serve immediately while the peaches are still warm and the cream is freshly whipped.
Tips:
- Peach Ripeness: Choose peaches that are ripe but firm to ensure they hold up well on the grill.
- Grilling: Keep an eye on the peaches to prevent burning. The goal is to get a nice char and caramelization without overcooking.
- Whipped Cream: You can prepare the cream ahead of time, but it’s best to whip it just before serving for the freshest texture.
This simple yet sophisticated dessert highlights the natural sweetness of peaches and the indulgence of creamy topping. Enjoy your grilled peaches with cream!